


Some members have been asking for help in figuring out how to bypass the factory crossover in the Quest / reQuests so they can use active crossovers.
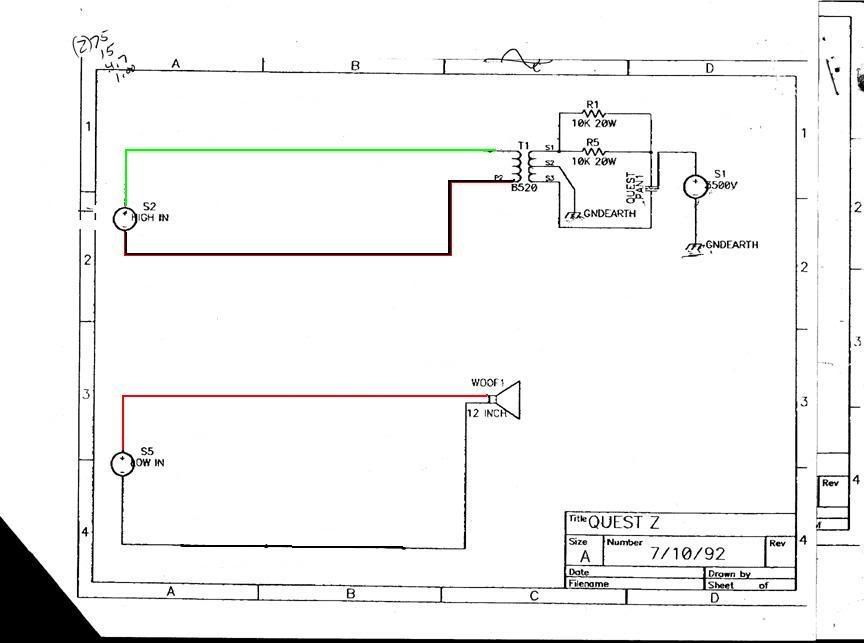
So here is a short description and attached is a schematic for how to bypass the passive crossover. This applies to most models of first-gen ESL speakers from ML.
Unplug the speakers and let them drain for 30 minutes or so.
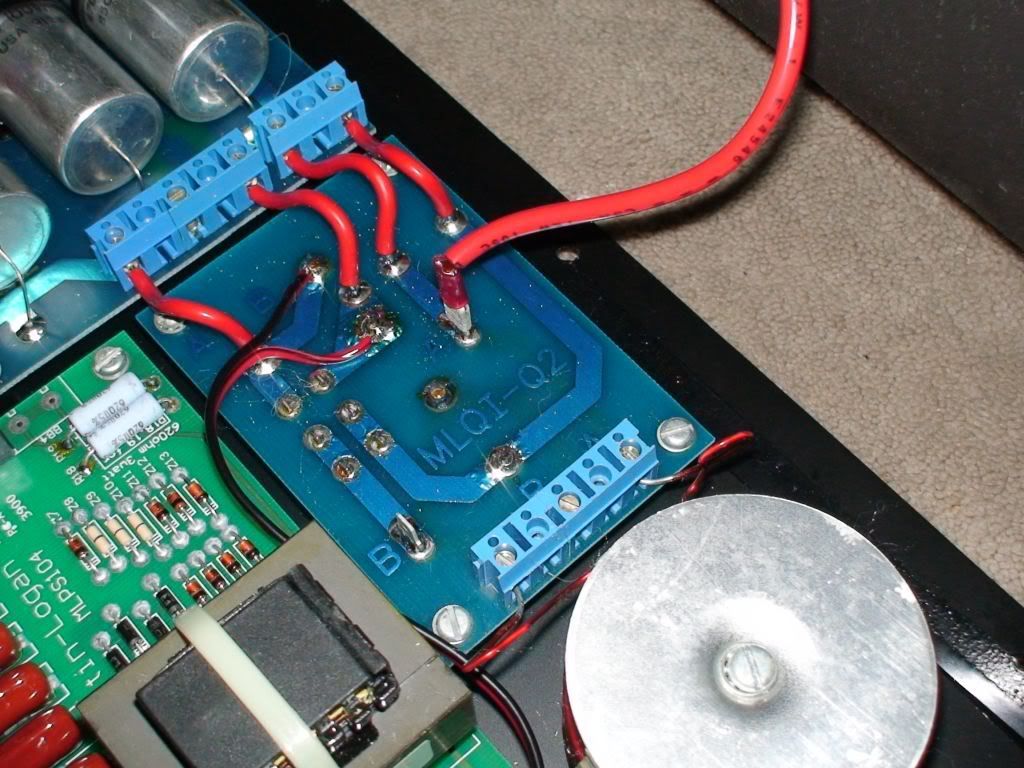
Unmount the electronics panel by removing the screws, then once open, carefully disconnecting the woofer leads, and the Panel leads. Pay special attention to the panel leads. Take pics, use labels, etc. you do not want to confuse what goes where.
After you’ve un-mounted the electronics panel, you will be able to work on the process of bypassing the existing passive crossover.
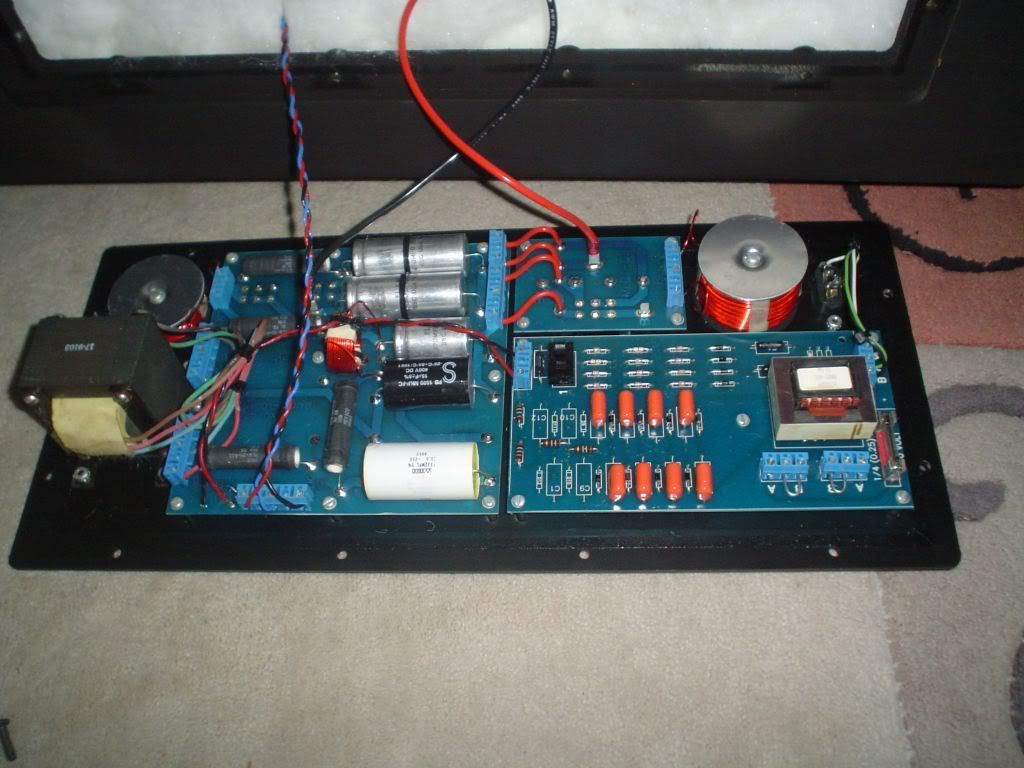
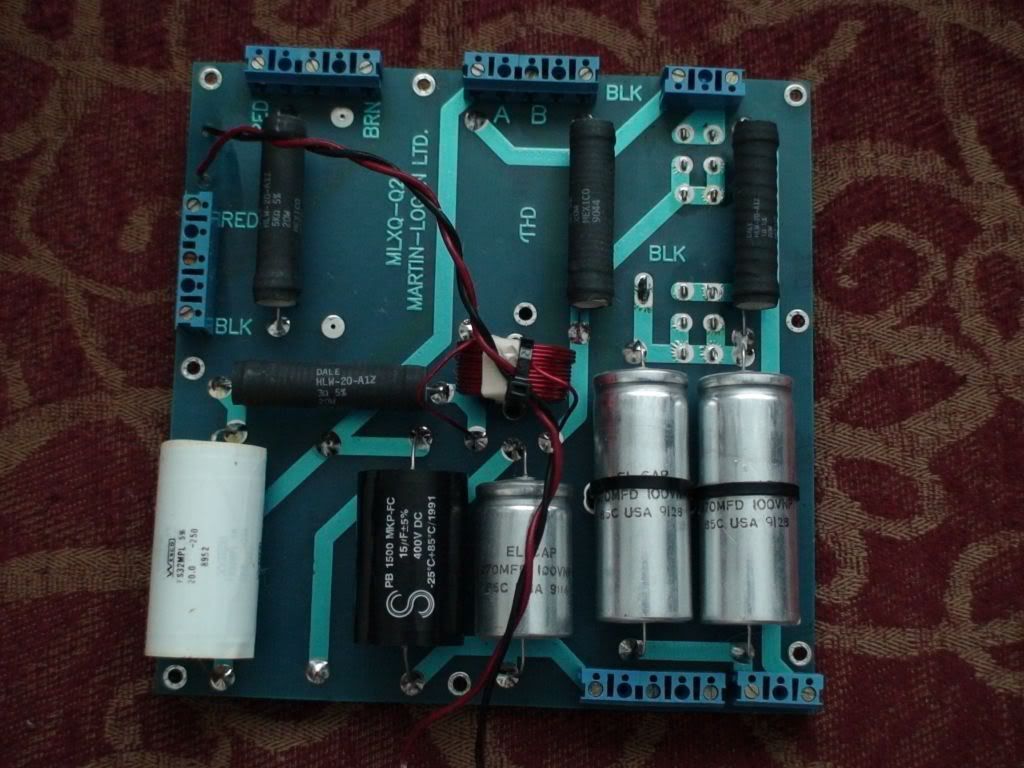
The first thing is, don’t be daunted. It’s not quite as bad as it looks. The majority of the passive parts are simply removed.
Now, if you are looking to do this in a way you could easily reverse, it’s a bit more complex, but not terribly. You just have to ensure things that shouldn’t touch, don’t")
Start by studying the before and after diagrams of the crossover. Take some pictures of you board before you touch anything. Make sure you know what is what in the crossover.
Here is a link to the stock request crossover: http://www.martinloganowners.com/~tdacquis/forum/showthread.php?t=126&highlight=crossover+schematic
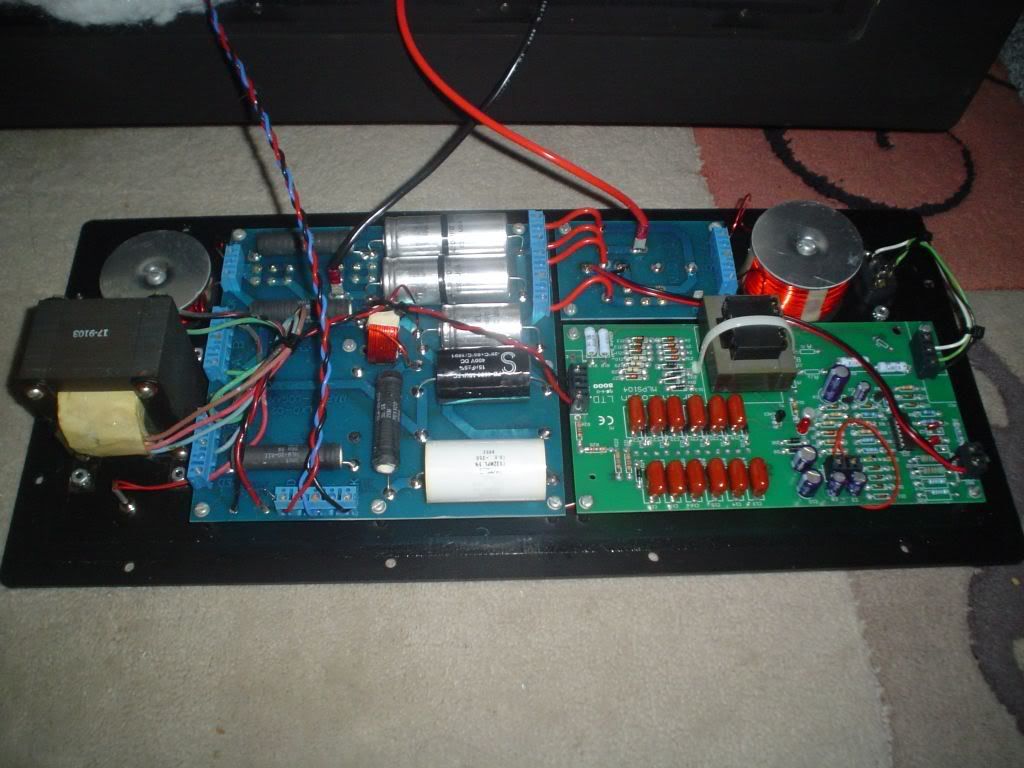
Once you are sure which leads to cut, go to town and cut the appropriate leads in the high-pass crossover. Put in a new wire from the negative HF post straight to the black lead of the step-up transformer.
For the high-pass, identify the cut points and bypass the existing components.
Please note: you must recover three of the 2 Ohm 20w resistors in the main x-over to build the paralleled set of 3 resistors on the hot lead before the transformer. (or go buy new ones if trying the preserve original passive for reversal). This is to ensure your amp sees a resistive load of some kind, otherwise it’s a fairly reactive load. Some amps will go ‘poof’ if driving a straight transformer (with a capacitive load on the other end to boot).
My Sunfire amps don’t care, they can drive it straight. So if you feel your amps are up to it, you can omit these resistors (they also cause a slight dip at 10K, see my SL3XC build thread for details and graphs).
With your new set of three 2 Ohm resistors, wire them to the red HF post, and their output to the Red feed to the step-up transformer.
The brown lead to the transformer remains with no connection, so cap it off.
Pretty simple really.
Have fun and post pics if you do this
So here is a short description and attached is a schematic for how to bypass the passive crossover. This applies to most models of first-gen ESL speakers from ML.
Unplug the speakers and let them drain for 30 minutes or so.
Unmount the electronics panel by removing the screws, then once open, carefully disconnecting the woofer leads, and the Panel leads. Pay special attention to the panel leads. Take pics, use labels, etc. you do not want to confuse what goes where.
After you’ve un-mounted the electronics panel, you will be able to work on the process of bypassing the existing passive crossover.
The first thing is, don’t be daunted. It’s not quite as bad as it looks. The majority of the passive parts are simply removed.
Now, if you are looking to do this in a way you could easily reverse, it’s a bit more complex, but not terribly. You just have to ensure things that shouldn’t touch, don’t
Start by studying the before and after diagrams of the crossover. Take some pictures of you board before you touch anything. Make sure you know what is what in the crossover.
Here is a link to the stock request crossover: http://www.martinloganowners.com/~tdacquis/forum/showthread.php?t=126&highlight=crossover+schematic
Once you are sure which leads to cut, go to town and cut the appropriate leads in the high-pass crossover. Put in a new wire from the negative HF post straight to the black lead of the step-up transformer.
For the high-pass, identify the cut points and bypass the existing components.
Please note: you must recover three of the 2 Ohm 20w resistors in the main x-over to build the paralleled set of 3 resistors on the hot lead before the transformer. (or go buy new ones if trying the preserve original passive for reversal). This is to ensure your amp sees a resistive load of some kind, otherwise it’s a fairly reactive load. Some amps will go ‘poof’ if driving a straight transformer (with a capacitive load on the other end to boot).
My Sunfire amps don’t care, they can drive it straight. So if you feel your amps are up to it, you can omit these resistors (they also cause a slight dip at 10K, see my SL3XC build thread for details and graphs).
With your new set of three 2 Ohm resistors, wire them to the red HF post, and their output to the Red feed to the step-up transformer.
The brown lead to the transformer remains with no connection, so cap it off.
Pretty simple really.
Have fun and post pics if you do this